

GitHub for Beginners. What is it & How to use it?
A code-hosting platform where collaboration and innovation occur from anywhere.

Every developer/student should have a GitHub account or a general understanding of what it does. Through this article, you will have a general understanding of what GitHub does through a simple tutorial! You do not need to have any prior knowledge of GitHub.
Article Outline
- What is GitHub
- Signing Up
- Creating your first repository
- How do you create a branch
- Uploading files or commit changes
- Making a pull request
- Merging the pull request
- Voila!
- Conclusion
- References
What is GitHub?
Signing up for an account
- Sign up here.
- Complete setup & verify email
Creating your first repository
A repository contains all project files, including the revision history. In short, it is a container to put all your code/documentation in and check all your edits(commits) to the files.
- After setting up and verifying your email, you will see this page. Click on Start a new project.
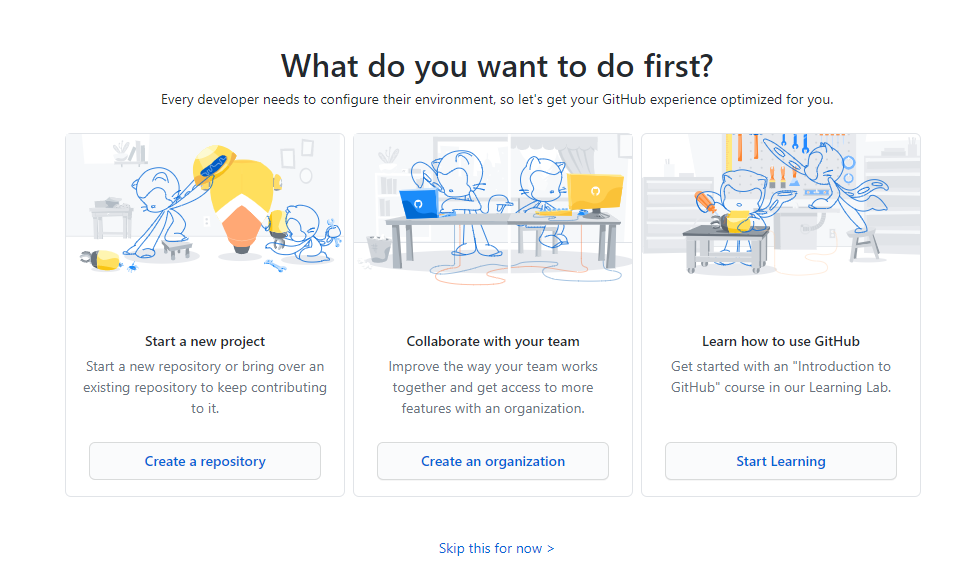
You can also learn how to use GitHub here.
- Create a new repository. Creating repositories will become more familiar to you as you continue to create more in the future.
Learn Markdown Language here to format your README files and communicate in projects.
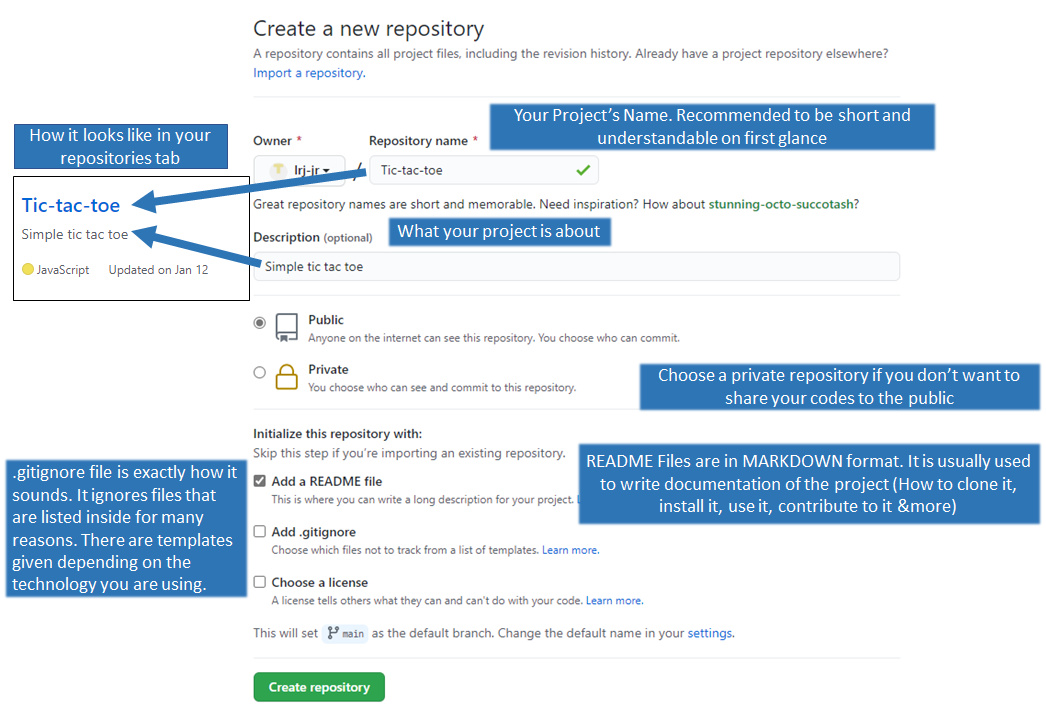 For now, .gitignore and licenses are not important. You can still read about them here:
 - Click on Create repository. After you have done setting up, this is how your repository will look.
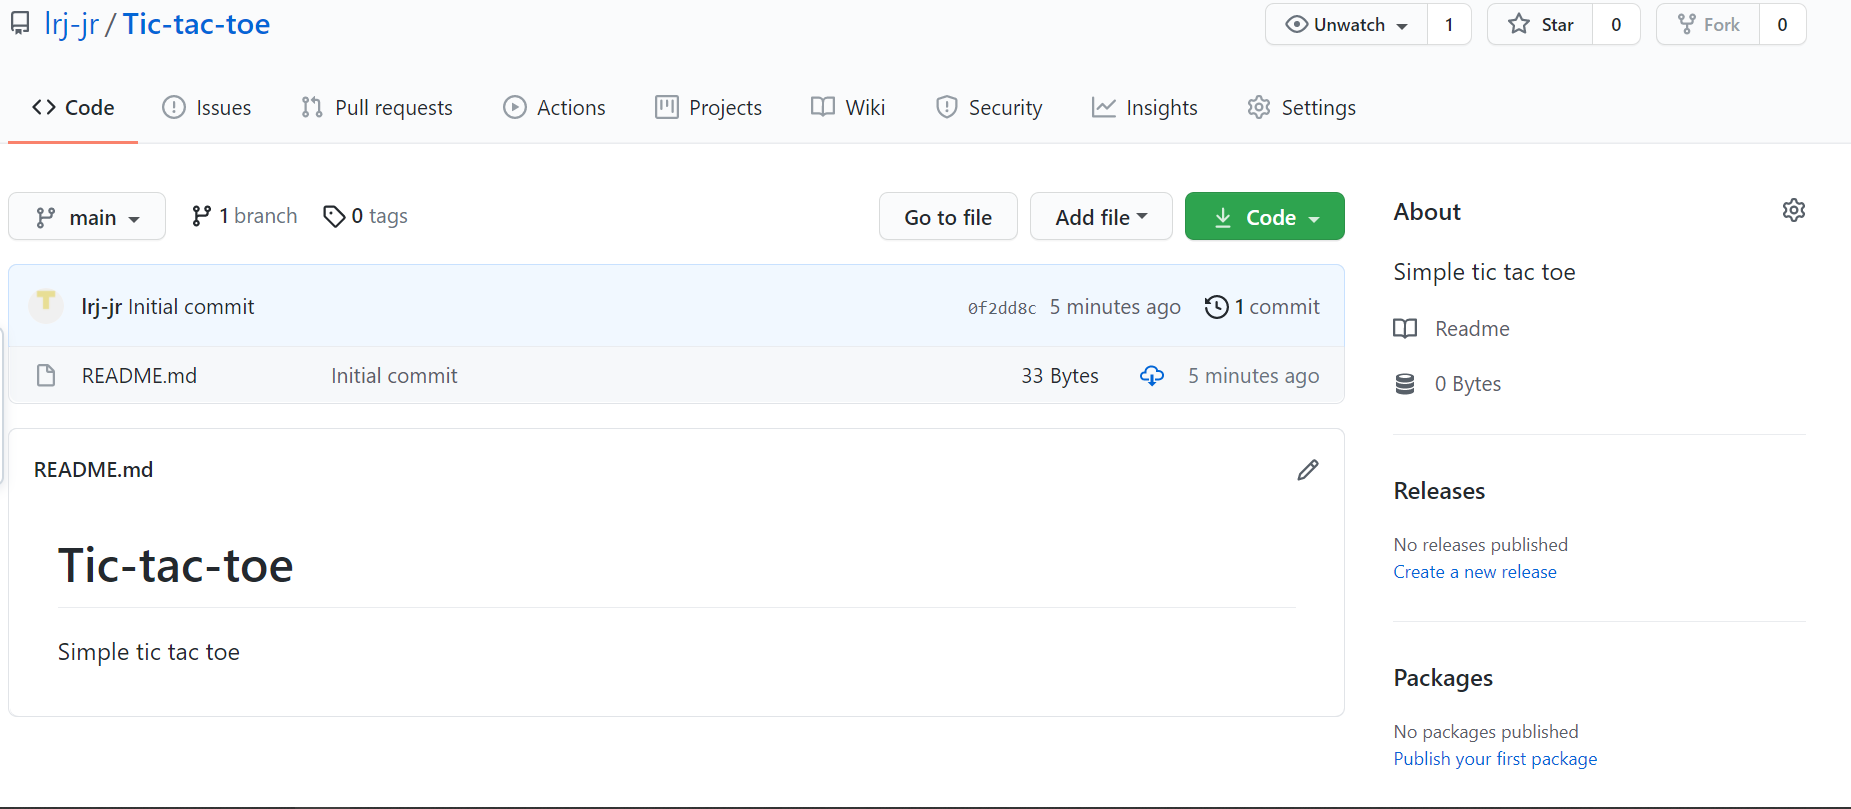
We will be focusing on uploading files, hosting using GitHub pages, issues, pull requests, branching, and committing changes below.
How do you create a branch
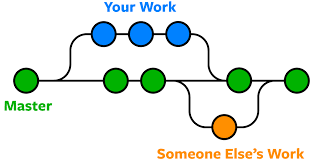
First, let us understand what a branch is and why do you need to create one! Branching allows you to have different versions of the repository at one time! The default branch for all repositories is named main.
In the image below, you can see a Your Work branch and a Someone Else's work branch. Both of these branches are a copy of the main branch. Imagine you are working with other developers on the same project for a different feature. You do not want to affect the main (production) branch before the feature/fix is stable. Branching will prevent breaking the original code.
To create a branch:
- Go to your new repository
- Click the drop-down at the top of the file list that says branch: main.
- Type a branch name of your choice into the new branch text box.
Make sure it is understood easily. If you are editing the
readme.mdfile, an example of the branch name would bereadme-edits. Others will understand what the branch does in general without looking into your changes.) - Click
Create branch:YourBranchName from 'main'
 Make it a good practice to always create a new branch before working on changes in a personal or collaborative project!
After the changes are completed, a pull request can be made to merge your changes to the main branch! No worries, we will be looking at how to create a pull request in the later sections.
Commit the changes made
As an example, I will be making changes to my README.md file.
- Click the
README.mdfile. - Click the pencil icon to edit.
- Make your changes.
- Write a commit message that describes your changes. By default, it will be
Update FileName - Click the green Commit changes button. This is like a "save" button.
Making a pull request
After you have successfully committed your new changes into your branched-out repository, you will have to make a pull request. The pull request is made to be able to merge your changes into the main branch. Your changes are reflected as green for additions and red for subtractions
In collaborative projects, this will be the stage where your code/changes are reviewed. You might be requested to make additional changes if needed before merging the changes into the main branch.
The easiest way to open a pull request:
- Click on
compare & pull requests - Type your pull request title if needed, or it will follow your last commit's message. Read about conventional commit messages here
- The description is to describe the changes you made. Normally, projects will have a template to follow.
- Look at your changes made.
- Press
Create pull requestwhen you are satisfied with all the changes.
If the compare & pull requests button is not there:
- Click the "pull requests" tab
- Click "New pull request"
- Change the branch to compare your new branch with the main branch. You will be able to see the differences between both branches
- Click "Create pull request"
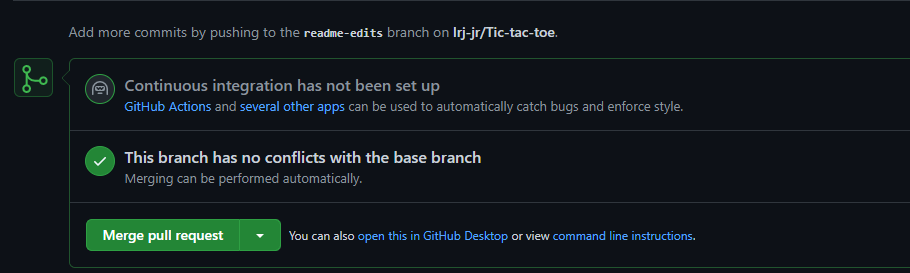
Merging the pull request
After reviewing your changes, you are now ready to merge the new branch's changes to the main branch! This means the main branch will now contain all the changes you made.
- Click the green "Merge pull request" button
- Click "Confirm merge"
- Your changes are saved and merged into the main branch. Feel free to delete the branch you created!

Voila!
You have successfully:
- Created your first project's repository
- Created a new branch
- Made changes to the existing file
- Committed the changes
- Opened a pull request
- Merged the changes into the main branch
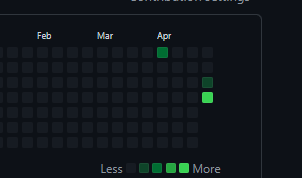
This is generally the workflow for using GitHub! Take a look at your green contribution squares!
 Read about the GitHub flow guide here
Conclusion
Using the GUI to do all the things mentioned above is a great start! Keep learning different workflows! For example, workflows for personal projects and collaborative projects are different. When you have a general understanding and feel comfortable navigating through GitHub, try learning Git! It is crucial and a must-have as one of your developer skills! In fact, I have an article: Git For Beginners
References
Thank you for reading! 😄
I hope you have gained a general understanding of what GitHub is and how it generally works! If you like my content, be sure to follow me and subscribe to my newsletter! Boost this article by leaving a reaction to support me!
That's all from me now! Have a great day/night.


